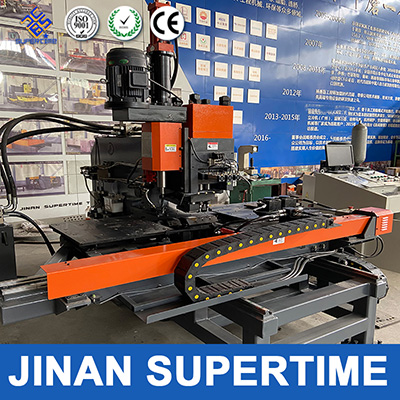
Test specification for CNC hydraulic punching machine
- 28 October 2024
The CNC hydraulic punching machine is designed for processing Q235, Q345, Q420 medium thick plates with a diameter of 6-25mm, and is used as a punching equipment in the industries of power towers, communication towers, and steel structure manufacturing. CNC hydraulic punching machines come in several models depending on the punching pressure, including 100 tons, 110 tons, 120 tons, 160 tons, and 200 tons.
Mastering the debugging steps and testing standards of CNC hydraulic punching machines to enable faster and better use of punching machines:
1. According to the foundation drawings, prepare the foundation and clean the surrounding area. Place, level, fix, and wire the CNC hydraulic punching machine on the foundation
2. Fill the hydraulic station oil tank with the specified type of hydraulic oil according to the requirements to the position indicated by the oil gauge on the tank
3. When using the CNC hydraulic punching machine for the first time, wipe it clean and lubricate each point of the CNC hydraulic punching machine according to the lubrication diagram
4. Check the connection status of each part, including the mechanical and hydraulic connections, as well as the wiring connections inside the electrical cabinet
5. Disconnect all air switches and then power the main circuit
6. Set servo drive parameters and manually adjust the actions of the X and Y axes
7. Check the connection of the hydraulic oil pipe joints. First, loosen the shut-off valve, then loosen all the pressure regulating handles of each overflow valve. Start the hydraulic station motor to determine the direction of the motor. If the wiring direction is incorrect, adjust the wiring direction
8. Adjust the electromagnetic relief valve of the low-pressure relief valve group to 6MP, and the electromagnetic relief valve of the high-pressure system valve group to a maximum of 25MP. Generally, it can be adjusted to 20-23MP
9. Eliminate electrical faults in the machine, manually test the operation of the equipment after confirming that there are no alarms, check if the operation is correct, and adjust the installation positions of each switch
10. Test punching small materials below 10mm, manually punching, and checking the quality of punching
11. Adjust the positioning accuracy of the X and Y CNC axes and make adjustments. Repeat the positioning of the X and Y CNC axes multiple times to confirm whether they meet the technical accuracy requirements
12. Stamping workpieces, measure and check whether they are within the tolerance range
13. Trial production, check the stability of the equipment
Sun
info@jntime.com
Tel/Whatsapp: +86 15020003877


